
Wednesday, 11 January 2012


Monday, 6 September 2010
cupcake party!

vanilla, lemon and red velvet cupcakes. i just can't help myself.
will put recipes up when i am not so sleepy...
gruyere and polenta tart.

'the new vegetarian' is one of my favourite places to go for new and exciting recipes! unfortunately, i had to improvise on this ottolenghi recipe. it originally was a comte and polenta tart, but comte uses animal rennet, as does the parmesan which was recommended to be used in the pastry. i replaced this with my home county cheese, davidstow cheddar. silly ottolenghi. anyway, i changed a few things round and it still came out wonderfully. i served it with parsnips, brocolli and a sweet potato mash.
"Adding polenta to short pastry, be it sweet or savoury, makes the "biting" experience more exciting. Serve with something fresh and sharp, such as a radish and lettuce salad dressed with lemon and garlic vinaigrette. Serves six to eight.
For the pastry
170g plain flour, plus extra to dust
60g quick-cook polenta
20g finely grated Davidstow cheddar
140g unsalted butter, fridge-cold and cut into cubes
50ml water
A pinch of salt
For the filling
200g gruyere, grated
150ml crème fraîche
150ml single cream
3 eggs
2 tsp nigella seeds
¾ tsp each salt and ground white pepper
200g chopped Swiss chard, cooked for a few minutes in olive oil (or spinach, washed, wilted and drained)
In a food processor, work all the pastry ingredients except the water to fine crumbs, add the water and mix until it starts coming together – if it's still very crumbly and dry, add a tiny splash of water and pulse again. Tip out on to a work surface lightly dusted with flour, and work until the pastry comes together. Gently roll it out into a roughly 5mm thick round disc. Lifting the pastry with a palette knife, turn it around as you roll, then use a rolling pin to lay it in a deep, 24cm fluted tin. Cut off any excess hanging over the edges and use the offcuts to patch up any gaps. Chill in the freezer for 10 minutes.
Heat the oven to 180C/350F/gas mark 4. Place a circle of greaseproof paper on top of the pastry case, fill with baking beans and bake for 20 minutes, until just golden. Remove the paper and beans, and bake for another 10 minutes, or until the pastry is cooked through. Remove from the oven and reduce the temperature to 150C/300F/gas mark 2.
While the pastry is cooking, mix together all the filling ingredients except the chard, then pour into the cooked tart case and dot with spoonfuls of chard. Bake for 30 minutes, or until the tart is just set and golden. Leave to cool for 10 minutes, remove from the tin and serve warm or at room temperature."
soup.

leftover vegetables - an onion, three leeks, a red pepper, a few baby potatoes and a couple of florets of brocolli.
boil in bouillon vegetable stock for half an hour or so.
blend in a blender.
put back in the pan and add some creme fraiche and salt and pepper.
LOVELY!
and far too easy...
Monday, 16 August 2010


Monday, 10 May 2010
vanilla cupcakes.

i made these cute little cupcakes for easter, however, leave off the chick decorations and they are perfect for any occasion!
ingredients.
120g plain flour
140g caster sugar
1 1/2 tsp baking powder
pinch of salt
40g unsalted butter
120ml whole milk
1 egg
1/4 tsp vanilla extract
----
250g icing sugar
80g unsalted butter
25ml whole milk
a couple of drops of vanilla extract
food colouring
method.
1. preheat the oven to 170c/gas 3. put the flour, sugar, baking powder, salt and butter in a mixer and beat on a slow speed until you get a sandy consistency and everything is combined. gradually pour in half the milk and beat until it is just incorporated.
2. whisk the egg, vanilla extract and remaining milk together in a bowl and add to the flour mixture. continue to beat together until you have a smooth mixture. don't overmix!
3. spoon the mixture into a tray with twelve cupcake cases. bake in the oven for 20-25 minutes until the sponge bounces back when touched. leave the cupcakes to cool on a wire rack.
4. whilst the cakes are cooling, make the icing. beat the icing sugar and butter together in a mixer, until everything is well mixed. turn the mixer down to slow and incorporate the milk and vanilla extract. if you are using one colour, add this at this point. beat the frosting for five minutes until it is light and fluffy. if you are using several colours, divide the icing into bowls and put a couple of drops of colouring into each and mix before icing the cupcakes. decorate with whatever!
light chocolate cake.

my boyfriend's mum very kindly posted me harry eastwood's book 'red velvet chocolate heartache' this week. the book is mainly cake based, but with a twist - each recipe uses a vegetable! i decided to make the light chocolate cake (made with butternut squash) for my friend may as a birthday gift. i didn't get to try it but the reports have been good
ingredients.
3 medium eggs
160g caster sugar
200g peeled and grated butternut squash
120g white rice (or plain) flour
3 tbsp good quality cocoa powder
80g ground almonds
1 tsp baking powder
1 tsp bicarbonate of soda
1/4 tsp salt
125ml buttermilk
----
i used 200g melted chocolate and some sugar flowers for the topping and decoration, however, the book suggests:
50g unsalted butter
200g icing sugar
50g marscapone
4 tsp cocoa powder
method.
1. preheat the oven to 180c/gas mark 4. line an 18cm cake tin with baking parchment and brush a little vegetable oil over the base and sides. (i used my bundt tin again!)
2. whisk the eggs and sugar in a large mixing bowl for about 4 minutes until pale and fluffy. beat in the butternut squash, followed by the flour, cocoa powder, ground almonds, baking powder, bicarb and salt. add the buttermilk and beat again until the ingredients are well mixed.
3. pour the mixture into the tin and bake for approximately 30 minutes. once cooked, remove the cake from the oven and peel off any baking parchment. leave to cool on a wire rack.
4. to make the icing that is recommended, beat the butter with 100g of the sugar in a large mixing bowl, until they form a paste. add the marscapone, cocoa powder and a pinch of salt, along with the remaining sugar. beat together. refrigerate for fifteen minutes, and spread over the cake once it has cooled.
i didn't use this icing! instead, i melted 200g of dark chocolate in a pan over a low heat, then spread it thinly over the top of the cake, before decorating with small icing flowers.
gin and tonic sorbet / earl grey cupcakes.

i made these things separately, however, served them together when some friends came round for dinner. i served the sorbet in china tea cups, as if both things weren't twee enough already!
gin and tonic sorbet.
ingredients.
350ml sugar syrup:
1 litre water
125g liquid glucose
375g caster sugar
put all the ingredients into a pan and bring to the boil, stirring to dissolve the sugar. simmer for two minutes, then leave to cool down.
250ml tonic water
75ml gin
juice of 1/2 a lemon
method.
combine all the ingredients together (including the sugar syrup once cooled). place in a container that is suitable for freezing, and freeze until the mixture is slushy. remove from the freezer and whisk until the icy lumps are broken up and the texture is smooth. place back into the freezer and repeat the chilling and whisking process until the sorbet reaches the right consistency.
earl grey cupcakes.
ingredients.
120ml whole milk
3 earl grey tea bags
100g plain flour
140g caster sugar
1 1/2 tsp baking powder
pinch of salt
40g unsalted butter
1 egg
1/4 tsp vanilla extract
----
250g icing sugar
80g unsalted butter
25ml whole milk
blue/pink food colouring
method.
1. put the milk and tea bags into a jug and leave to soak for at least an hour.
2. preheat the oven to 170c/gas 3. put the flour, sugar, baking powder, salt and butter in an electric mixer and beat on a slow speed until everything is combined. it should have a sandy consistency.
3. remove the tea bags from the infused milk and add to the egg and vanilla extract. slowly pour half into the flour mixture, beating well until all the ingredients are well mixed. pour in the remaining mixture and beat everything together on a medium-slow setting until the mixture is smooth.
4. sppon the mixture into a tray lined with twelve cupcake cases. they should be about two thirds full. bake for 20-25 minutes. once cooked, leave them to cool on a wire rack.
5. whilst they are cooling, beat the icing sugar and butter together in a mixer, on a medium speed. turn the mixer down to a slow speed and slowly pour in the milk and a drop of pink and blue colouring to form a purple colour. continue beating the icing on a high speed for about five minutes until it is light and fluffy. once the cupcakes have cooled completely, spoon or pipe the frosting on top. decorate with silver balls, or whatever else you would like!
aubergine cheesecake and cheesy polenta chips.
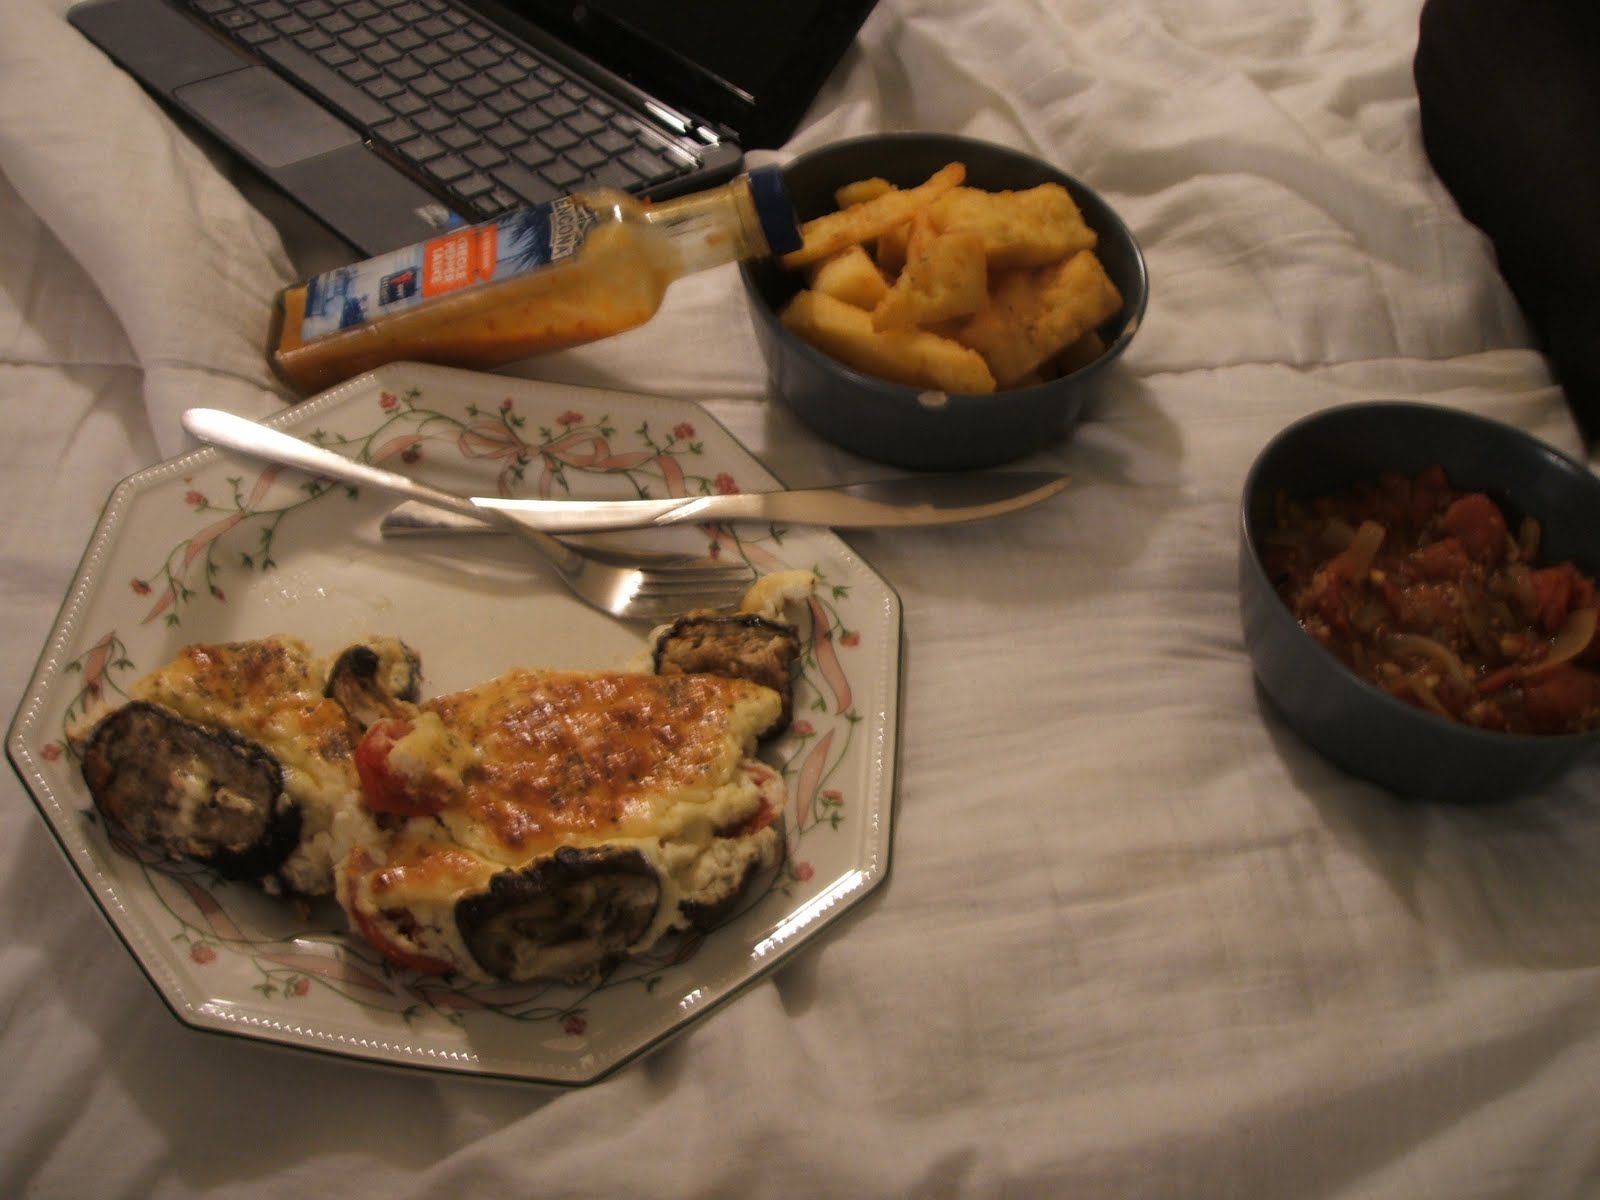
i made these as a treat dinner for sean last week. both went down incredibly well. i was put off as i thought both things may be complicated to make, but they were pretty stress free! the recipes come from my new fave chef, yotam ottolenghi's vegetarian section on the guardian website.
cheesy polenta chips (with a rich tomato sauce).
ingredients.
375ml vegetable stock
60g quick polenta
20g butter
60g grated cheese
salt and black pepper
vegetable oil
plain flour
---
350g fresh plum tomatoes
2 tbsp olive oil
1/2 a medium onion, thinly sliced
2 garlic cloves
1 pinch of chilli flakes
1/4 tsp caster sugar
method.
1. line a shallow tray with clingfilm. in a pan, bring the stock to a boil and add the polenta. stir over a low heat for about five minutes until it thickens. remove the pan from the heat and add the butter and cheese, season well with salt and pepper and stir.
2. transfer the polenta mix into the tray and smooth across with a wetted spatula (anything else will stick to the mixture!). it should be approximately 1.5cm deep. cover with clingfilm, then put in the fridge and chill for at least 30 minutes.
3. meanwhile, place a large non-stick pan on a high flame. once it has heated through, add the tomatoes to the pan and leave for fifteen minutes, stirring occasionally. this will cause the skins to blacken. once done, put the tomatoes into a bowl and break them up, removing the skins too.
4. heat the olive oil in a pan. cook the onion for three minutes to soften. add the onion and the oil to the tomatoes. then stir in the garlic, chilli, sugar and salt. leave at room temperature.
5. when the polenta has set, cut it into approximately 6cm long chips. fill a medium saucepan up to about 2cm with vegetable oil and heat. toss the chips in flour and fry in batches for about three minutes at a time. they should be golden brown. drain them on some kitchen towel and serve immediately with the tomato sauce.
aubergine cheesecake.
ingredients.
90ml olive oil
2 small aubergines, cut into 2cm slices
150g feta cheese
150g cream cheese
60ml double cream
3 eggs
150g baby plum tomatoes, cut in half lengthways
2 tbsp picked oregano leaves, torn
salt and black pepper
method.
1. preheat the oven to 190c/gas mark 5. line a 19cm square/22cm round baking tin with foil, then brush lightly with oil.
2. lay the aubergine slices on a baking tray lined with baking paper and brush with four tablespoons with olive oil. sprinkle with salt and pepper and bake for approximately 40 minutes until they are soft and golden. once cooked, set them aside to cool. lower the oven temperature to 150c/gas mark 2.
3. put the feta, cream cheese, cream and eggs in a bowl with some pepper and whisk until thick and smooth. arrange the aubergine neatly in the prepared tin, some may need to overlap. fill any gaps with the tomatoes and sprinkle in half of the oregano.
4. pour the cheese mix over and sprinkle on the rest of the oregano. bake for 30 minutes until the mix sets. leave the cake to cool down slightly, then cut into slices and serve.
i have been...

i have been incredibly lazy with this blog. a slap on the hand is deserved!
i have some updates, though!
the first, a continuation of the last post. i made the chocolate cake for a work friend's birthday. i made it in a bundt tin (my new favourite tin!) and decorated it with grated white chocolate. everyone at work thought i had cheated and bought it! winner.
Monday, 15 February 2010
mega mega chocolate cake death.

i have tried many chocolate cake recipes, but i always come back to this one! it's rich, fudgy and very unhealthy. awesome.
ingredients:
cake:
200g good quality dark chocolate
200g butter, cut into pieces
85g self raising flour
85g plain flour
1/4 tsp bicarbonate of soda
200g light muscovado sugar
200g golden caster sugar
25g cocoa powder
75ml buttermilk
ganache:
200g good quality dark chocolate
284ml carton double cream
2 tbsp golden caster sugar
method:
1. butter a 20cm round cake tin and line the base. preheat the oven to 140c/gas 3. break the chocolate into a saucepan, add the butter and melt together. don't overheat as the chocolate will burn.
2. mix the two flours, bicarbonate of soda, both sugars and cocoa powder in a bowl. beat the eggs together in a separate bowl and add the buttermilk. pour the melted chocolate mixture into the flour mixture and stir. add the egg mixture and stir, making sure everything is thoroughly mixed together.
3. pour the mixture into the prepared tin. bake for around 1 hour 30 minutes. test the mixture with a skewer before you take it out - if the skewer comes out with some mixture on, the cake needs to stay in for a bit longer! once out, leave the cake to cool.
4. turn the cake out of the tin. make the ganache by breaking up the chocolate and putting it into a bowl. heat the cream and sugar in a saucepan until it's about to boil then pour over the chocolate and stir in. ensure the mixture is smooth and silky. pour the ganache over the cake and serve.
verdict: 9.6/10. this really is a perfect cake!
parsnip, cranberry and chestnut loaf.


i made this on boxing day, as an alternative to meat to go with our boxing day roast dinner. it was fucking awesome. next time, less cranberries. i think i only used half the recommended amount, and it was totally sweet enough! also, i burnt the cranberries whilst cooking them and they made my eyes sting, that's probably why i hold a grudge against them now. haha!
ingredients:
4 tbsp butter
3 onions, chopped
15g pack sage
200g cooked chestnuts
100g walnuts
100g breadcrumbs
1/2 tsp mace
1 egg, beaten
500g cranberries
175g caster sugar
550g parsnips
1 tbsp honey
method:
1. melt 1 tbsp of the butter in a pan and add the onions. gently cook for 10-15 until the onions soften. stir in the sage for one minute, then tip the contents into a large mixing bowl. pulse the chestnuts in a food processor until chopped into small pieces, then add them to the onion mix. repeat this with the walnuts. add the breadcrumbs, mace, egg and season with salt and pepper. mix everything together.
2. put the cranberries and sugar into a pan and simmer for 8 to 10 minutes over a high heat. the cranberries will pop slightly and the sauce will become sticky. set aside to cool. grease a 900g loaf tin, and line with greaseproof paper that covers the base and two ends.
3. bring a large pan of salted water to the boil. add the parsnips and boil for three and a half minutes. drain well. from the thinner ends of the parsnips, cut off lengths that fit widthways across the bottom of the loaf tin. chop the remaining parsnip into the nut mixture.
4. heat the oven to 180c/160c fan or gas 4. coat the parsnip lengths in 1 tbsp of butter and the honey, then fit them into the tin. top with half the nut mixture. make sure it's pressed down firmly. spread a third or so of the cranberry sauce on top, then top this with the remaining nut mixture. press down as before. cover in foil and bake for an hour.
5. melt the remaining butter and add the remaining sage, and pour over the loaf, to serve. use the rest of the cranberry sauce as an accompaniment.
my verdict: 9/10
Monday, 14 December 2009
not forgotten...
updates will follow when i have some more time!
today i made green and blacks chocolate truffles, and white chocolate brownies (blondies). really good. recipes to come!
x
today i made green and blacks chocolate truffles, and white chocolate brownies (blondies). really good. recipes to come!
x
Saturday, 28 November 2009
thai satay wraps.

the picture isn't great on this one because gem was home from work and we were more concerned with eating it. this was an experimental idea that popped into my head and worked to a certain degree, but definitely needs some fine tuning. this works essentially the same as a basic stir fry and with my generous measurements probably feeds about three people. aside from the sauce, practically everything can be changed to your own preference.
recipe.
the sauce:
- 3 tablespoons crunchy peanut butter (whole earth is best)
- 2 tablespoons sweet chilli sauce
- 2 tablespoons soy sauce
- 100ml water
the stirfry:
- 200g brown rice
- 1/2 bag of quorn pieces (this can be changed to a vegan alternative)
- 3/4ths a red onion
- 1/2 a red pepper
- 1/2 a yellow pepper
- 1 standard can of kidney beans
- 30g roasted peanuts
also, don't forget the tortillas/flatbread for wraps!
method/improvements.
firstly, get that sauce ready. mix all the ingredients together until it's thin (you can do this with a spoon just fine, no need for a blender) and it's to your desired taste. next up, boil and drain the rice to however the instructions say. once you're near the end of doing that, commence usual stirfry routine by frying your veg and additional ingredients (make sure to time it all right so you aren't overdoing the quorn/veg/rice/etc) throwing in the satay with the peanuts. if you've never wrapped a burrito before, it takes some practise (above picture proves this) so i'll leave you in the able hands of the aptly-named howtowrapaburrito.com. then EAT!
i only planned this about 5 hours before gem got home, so it was a little rushed (not soaking my own kidney beans and only using standard brown rice). however, i can't argue with using peanut butter in a main meal kicking the ass of every tastebud i have. i definitely need to sort out making my own spanish rice, and it probably could've used a bit more sauce. aside from that, a solid meal which is easily interpreted however you want.
Wednesday, 25 November 2009
houmous/hummus/hvmmvs.

i maintain that people only buy houmous in a supermarket because they don't realise it costs about 50p to make a metric ton of the stuff at home (currently topping the giraffalafel's list on "rip-offs" is sainsbury's charging extra for chunky houmous WHEN YOU JUST AREN'T BLENDING IT AS MUCH WHAT THE HELL). ideally, you need a blender, but i've seen it made with some vigorous stir action before. this is a super quick one, assuming you aren't doing your own chickpeas. for the amount pictured above i just doubled the recipe and managed to feed me, gem and all four of the cut ups (i also made about 600g of pasta with this for well under £20)! this easily serves two people. god damn, i love houmous.
recipe.
- 1 can of chickpeas
- 60ml liquid from the can (this stuff never smells too hot, but trust me)
- 3 to 5 tablespoons lemon juice (depending on taste, i barely use 3)
- 1 1/2 tablespoon tahini
- 2 cloves garlic (crush 'em up)
- 2 tablespoons olive oil
method/improvements.
drain the chickpeas and set aside liquid from can. blend all this in to personal preference thickness-wise, then add salt and pepper to taste (no more than a tablespoon of salt, for me). i always add i little more liquid and olive oil than the recipe just to stop it being really dry. i would also recommend throwing in chilli (my chilli/hot sauce addiction will be written about another time), red pepper, and whatever else you think would work! my friend brooke tells me jalapeno peppers are amazing to blend in, but i'm yet to try this. get creative with it!
Monday, 23 November 2009
wild mushroom tartlets.

ingredients.
375g block puff pastry
flour, for dusting
25g butter
300g mixed wild mushrooms (i just used button and chestnut mushrooms)
25g vegetarian cheese (veggie parmesan is ideal)
1 garlic clove, finely chopped
1 egg, beaten
method.
1. roll out the pastry on a floured surface and cut out two or four circles (depending on how many you are cooking for). leave these to chill in the fridge on a baking tray.
2. heat the oven to 200 degrees celsius/gas mark 6. heat a large frying pan until hot, add the butter, and fry the mushrooms for five or so minutes, until there is no liquid left in the pan. season with black pepper, then take them off the heat and mix them in with the cheese and garlic. you can add parsley at this stage too, if you are a fan of it.
3. score a 1cm border around the edge of each pastry circle. this is what makes it puff up round the edge! be careful not to cut all the way through the pastry, though. brush the edges with the beaten egg, then spoon the mushrooms equally into the centre of the pastry circles.
4. bake the tarts for 20 minutes until they are puffed up and golden, and serve immediately.
my verdict.
these were simple to make but looked pretty impressive (according to my standards, anyway!). the pastry was a good accompaniment to the mushrooms, however, i found that it was quite a dry dish. when i make it next time, i think i'll make a sauce or gravy to go with it. i served them with salted mange tout. lovely.
8/10
Sunday, 22 November 2009
caramel slices.
 ingredients.
base:
230g plain flour
115g dessicated coconut
115g brown sugar
125g butter
---
caramel:
75g golden syrup
125g butter
2 x 400g cans condensed milk
---
topping:
185g dark chocolate
3 tbsp sunflower oil
method.
1. preheat the oven to 200 degrees celsius/gas mark 6. line a 20x30 cm slice tin with greaseproof paper.
2. melt the butter. stir the flour, coconut, butter and sugar together in a bowl to form the base. i found it a little easier to use a food processor to get an even mixture! press firmly down into the the tin, in an even layer.
3. bake the base for around 15 minutes, or until it has become slightly golden.
4. meanwhile, mix the caramel ingredients together in a saucepan, and simmer for ten minutes. make sure you stir the mixture continuously as the caramel is easily burnt!
5. the caramel should be of a thick consistency. pour the mixture over the base, and return to the oven for 15 minutes, or until the caramel starts to bubble and brown. i found it only needed around 10 minutes all in!
6. once removed from the oven, chill the tray in the fridge for an hour or so. once the caramel has hardened, combine the chocolate and sunflower oil in a saucepan, and heat over a low setting until it has melted together. pour the chocolate over the slice and chill again. once set, cut into pieces!
my verdict.
although i was skeptical of this being an easy recipe to make, it did turn out to be true. the one downfall to my slices was that i burnt the bottom of the base, as our oven gets a bit over excited at times! this did add some more crunch to them though, and so they weren't ruined in any way.
7/10
bonjour.
welcome!
a recently discovered love of food and animal related puns spurred me on to create this.
enjoy.
x
a recently discovered love of food and animal related puns spurred me on to create this.
enjoy.
x
Subscribe to:
Posts (Atom)